Add actionETL Manually
Note
The recommended way to create a new actionETL projects is to use a template as described in the Getting Started instructions as well as in Dotnet Templates.
To add actionETL to an existing project, use the actionetl.addtoproject template.
This article also creates a new project, in this case for a .NET Framework console project, and adds actionETL to it. It doesn't however use any templates, and instead performs each step explicitly, in this case using Visual Studio.
1. Create Project
- In Visual Studio, use File > New > Project... to create an empty C#
Console App (.NET Framework)project, picking Framework.NET Framework 4.6.2or higher. This will also create a new "Solution", to which we can later add further projects.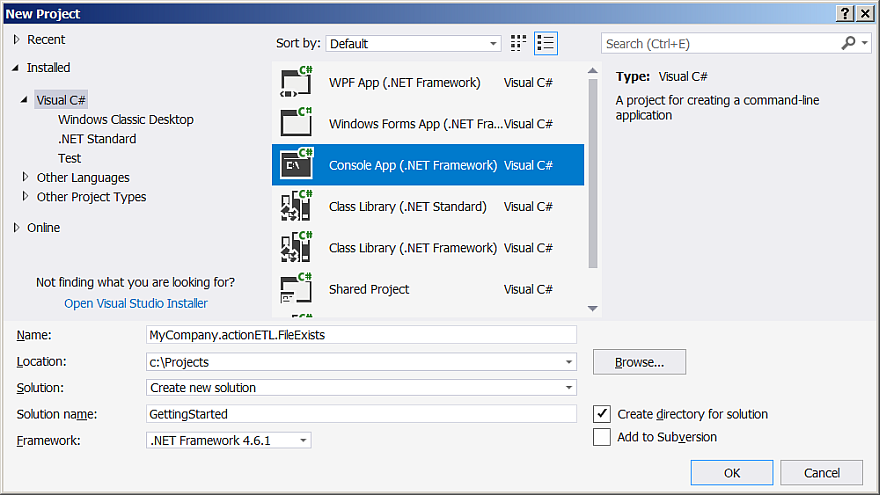
- Other project types (Windows Forms etc.) are also supported, but a console application is usually appropriate for a typical batch oriented ETL application.
2. Add License File
Add an "actionetl.license.json" license file to the root of the project.
Right-click the file, select Properties, and set:
- Build Action = "Content"
- Copy To Output Directory = "PreserveNewest"
3. Add "app.config" Settings
Although optional (and without effect for this trivial application), adding the highlighted
runtime section below to "app.config" can significantly improve dataflow performance
(more details at .NET Framework Run-time Settings):
<?xml version="1.0" encoding="utf-8" ?>
<configuration>
  <startup>
    <supportedRuntime version="v4.0" sku=".NETFramework,Version=v4.6.2" />
  </startup>
  <runtime>
    <gcConcurrent enabled="false"/>
    <gcServer enabled="true"/>
  </runtime>
</configuration>
4. Modify Project Properties
Uncheck Prefer 32-bit
Although optional (and irrelevant for this trivial application), best practice when
requiring large amounts of memory (such as with high volume dataflows) is to
uncheck Prefer 32-bit on the project properties Build page, which will make the
application run as 64-bit if the operating system is 64-bit. This gives the application
access to all available memory, avoiding out of memory issues as far as possible.
Note
- actionETL is compiled for the
Any CPUplatform, which allows the consuming application to be compiled for either of theAny CPU,x86, orx64platforms. Any CPUperformance running as a 64-bit process is very similar tox64performance. Both are somewhat faster thanx86orAny CPUrunning as a 32-bit process for large volume dataflows.
Set C# v7.2 or Higher
Visual Studio 2019 and later already defaults to the latest C# version. For Visual Studio 2017, perform the following:
The actionETL API uses recent C# features. Set Project Properties > Build > Advanced... > Language Version to:
- "C# 7.2" or later version, or
- "C# latest minor version (latest)"
5. Install Packages
Open Tools > NuGet Package Manager > Package Manager Console and execute:
Install-Package actionETL
This will also automatically install the package dependencies.
Note
- The package manager requires an internet connection to retrieve actionETL and dependent packages from nuget.org
- If the package manager can't find the
actionETLpackage, double check that "nuget.org" (actual linkhttps://api.nuget.org/v3/index.json) is enabled as a package source.
6. Modify Code
Replace "Program.cs"
Replace the default content of the "Program.cs" file with the following:
using actionETL;
using System.Threading.Tasks;

namespace MyCompany.ETL.FileExists
{
    static class Program
    {
        static async Task Main()
        {
            // Example worker system: test if file exists
            var outcomeStatus = await new WorkerSystem()
                .Root(ws =>
                {
                    // Example worker: check filename loaded from "actionetl.aconfig.json"
                    _ = new FileExistsWorker(ws, "File exists", ws.Config["TriggerFile"]);
                })
                .StartAsync();

            // Exit with success or failure code
            outcomeStatus.Exit();
        }
    }
}
Add "actionetl.aconfig.json"
Add the configuration file "actionetl.aconfig.json" to the root project folder, and ensure it gets copied to the output directory:
- Right-click the project, Add > New Item... > General > Text File, and add "actionetl.aconfig.json"
- Right-click "actionetl.aconfig.json", Properties:
- Build Action = "Content"
- Copy To Output Directory = "PreserveNewest"
- Add this content:
{
  "configurations": [
    { "TriggerFile": "C:/Temp/Trigger.trg" } // Note forward slash to avoid escaping
  ]
}
Add "nlog.config"
Add this NLog configuration to an "nlog.config" file in the root project folder, and ensure it gets copied to the output directory:
- Right-click the project, Add > New Item... > General > Text File, and add "nlog.config"
- Right-click "nlog.config", Properties:
- Build Action = "Content"
- Copy To Output Directory = "PreserveNewest"
7. Build and Run Project
Build and run the project as described in Getting Started - 2. Build and Run Project.